Image may be NSFW.
Clik here to view.
Despite all the legal turmoil surrounding the TVAddons community they are back on the scene and recently launched a plugin that should help a lot of newcomers to the scene install addons…similar to their old Fusion/Indigo addon provided. This solution on the other hand is a means to perhaps bypass any legal ramifications as they no longer host any of the addons themselves.
Instead this will allow any user the ability to install an addon straight from GitHub. If you’re unfamiliar with Git there’s no need to get to concerned. Almost every plugin other author tends to use this for something called version control as well as the ability to fork and share plugin work. This is extremely useful and why you see so many forks of a lot of the popular addons within the community.
Similar to a lot of our older tutorials which relied on the Fusion Installer it’s important to install this for ease of use and quick updates.
Here’s how you do it.
Installing the Git Browser in Kodi 17+
Installing is easy, simply follow these steps to get started.
Start with adding the repository source.
- First step is to add the TVAddons source, start by clicking the gear icon.Image may be NSFW.
Clik here to view.
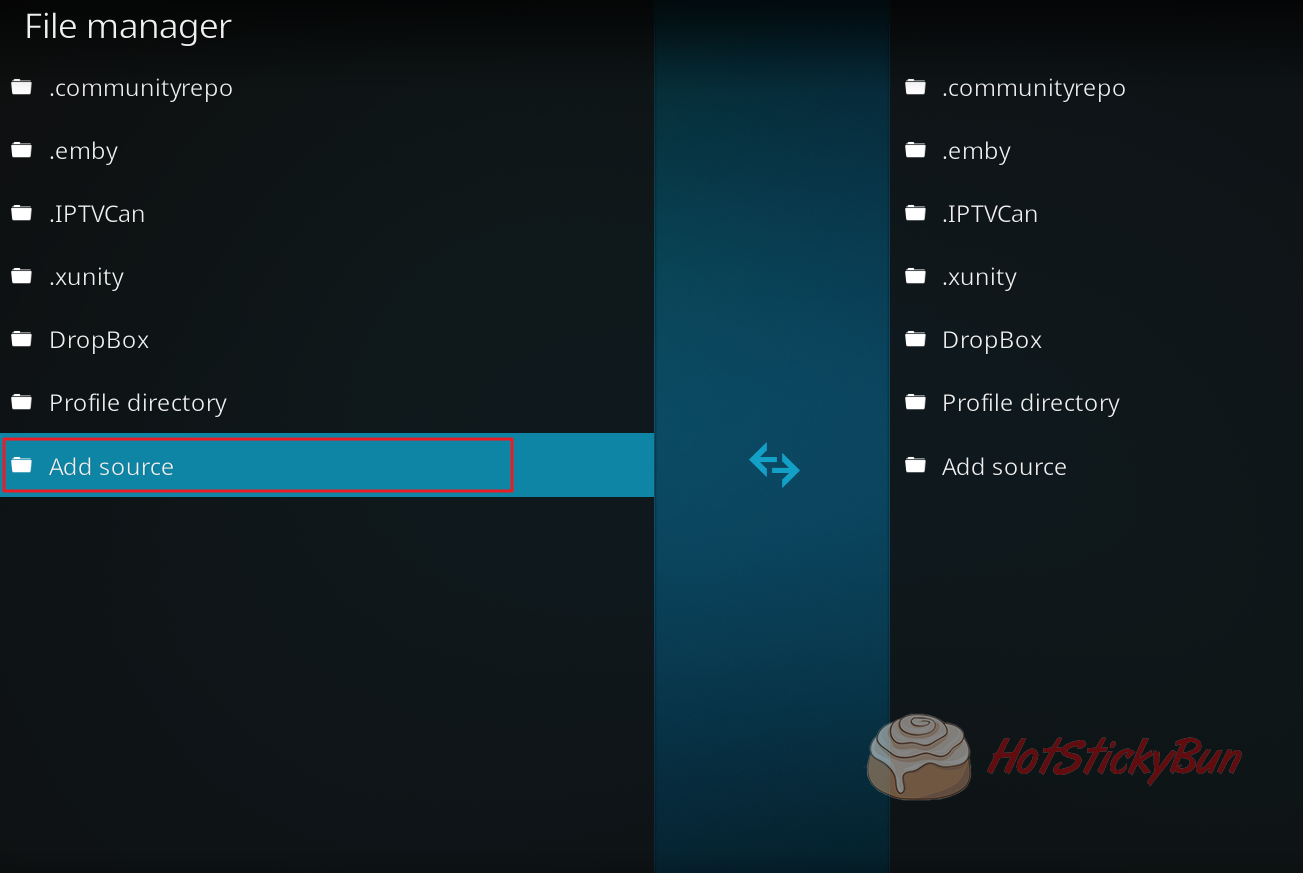
- Select File manager and enter. Image may be NSFW.
Clik here to view. - Add Source.Image may be NSFW.
Clik here to view. - Enter in the same information below to add the Git Browser Repo.Image may be NSFW.
Clik here to view.


Adding the Git Browser To Kodi
Now that we’ve added the source we need to add the repository and then the Git Browser.
- Scroll down to Add-ons from the home screen and hit enter.Image may be NSFW.
Clik here to view. - Click the box icon in the top left.Image may be NSFW.
Clik here to view. - Select Install From Zip File.Image may be NSFW.
Clik here to view. - Select Fusion that we setup earlier above.Image may be NSFW.
Clik here to view. - Select kodi-repos and then english from the next menu. Image may be NSFW.
Clik here to view. - Scroll down and select repository.xbmchub.x.x.x.zip (x.x.x being version number).Image may be NSFW.
Clik here to view. - Once complete you’ll get a notification in the top right. Back on the addons screen this time choose “Install from repository”.Image may be NSFW.
Clik here to view. - Find TVADDONS.CO Add-on Repository and hit enter.Image may be NSFW.
Clik here to view. - Choose Services.Image may be NSFW.
Clik here to view. - Select Git Browser.Image may be NSFW.
Clik here to view. - Last but not least, simply hit Install.Image may be NSFW.
Clik here to view.


That’s all there is to it. Using the Github Install is straight forward. Simply open it up and you’ll see a few options to install via username, repository title or Addon ID.
Install The Git Browser in Kodi Video Tutorial
We’ll have a video coming shortly to help.
The post How To Install Git Browser in Kodi appeared first on Hotstickybun
